Proton Mail is an email service focused on privacy, encryption, security and ease of use. It is offered by Proton AG, headquartered in Geneva, Switzerland. What makes it different from others and recommended by guides like Security-in-a-Box and PrivacyTools.io? Its focus on privacy: in addition to features like end-to-end encryption and two-factor authentication, Proton Mail is based in Switzerland, a country known for its strong privacy laws.
Proton Mail can be used for free with up to 1 GB of dedicated mail storage so you can try the service. Paid plans are also available with more capacity (starting at 15 GB) and more features. You can subscribe to a paid plan using a payment card or Bitcoin. Proton Mail sustains itself through plan sales and therefore doesn’t need to snoop on users’ emails to show them advertising – like Gmail does, for instance.
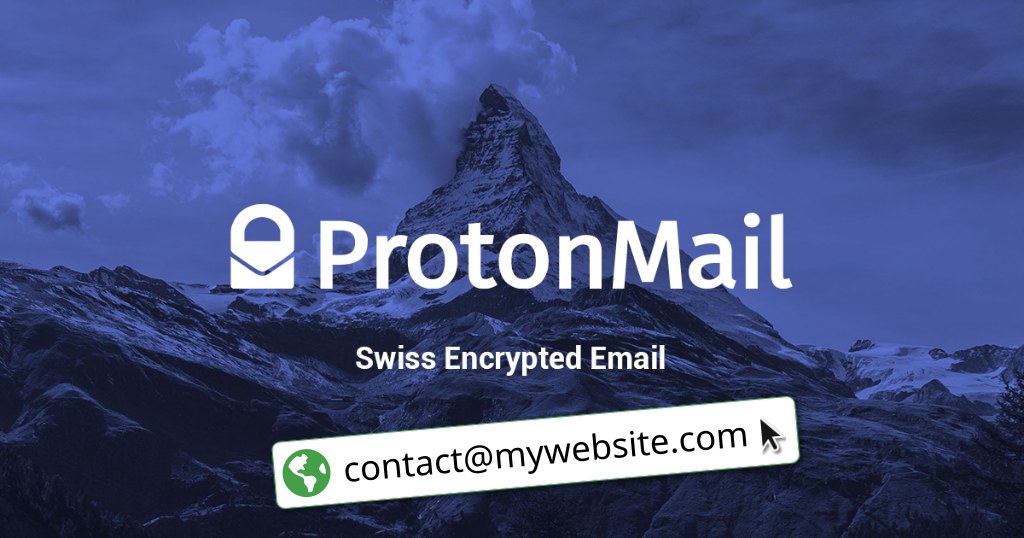
What if I told you that one of the paid Proton Mail extra features is the ability to set up a custom email domain? (e.g. contact@mywebsite.com) Have you ever thought about combining the useful with the pleasant? Securing your email communications and being able to be contacted by an address with a professional feel.
This is what I did for myself, and today I’m here to share a tutorial showing how you can do it too.
I registered my domain with Namecheap, so I’ll use that registrar as reference. But you should be equally capable of setting up your custom domain with Proton Mail – perhaps a little differently, of course – if you use another registrar or your own DNS servers.
Signing up for Proton Mail
For this tutorial, I’ll assume you already have a Proton Mail account and have upgraded to a paid plan. Any plan entitles you to at least one custom domain.
Setting up the custom domain
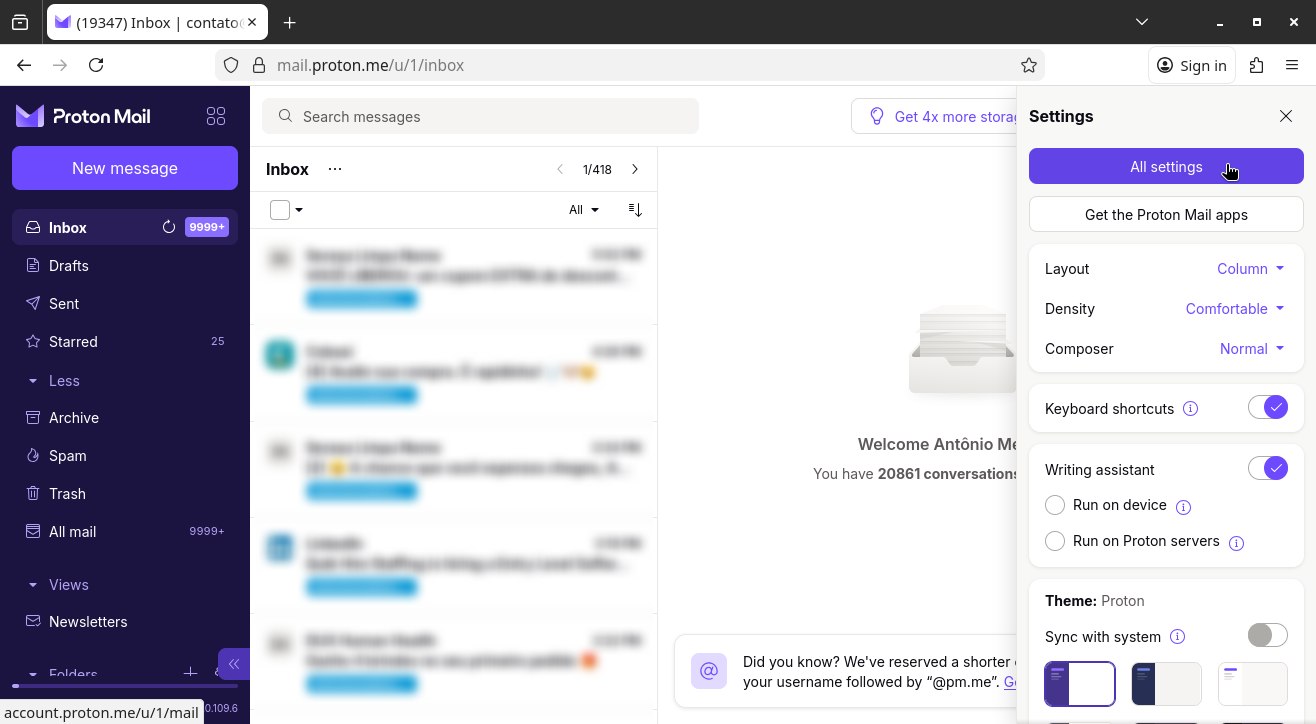
Start by signing into Proton Mail. Then, access its settings:
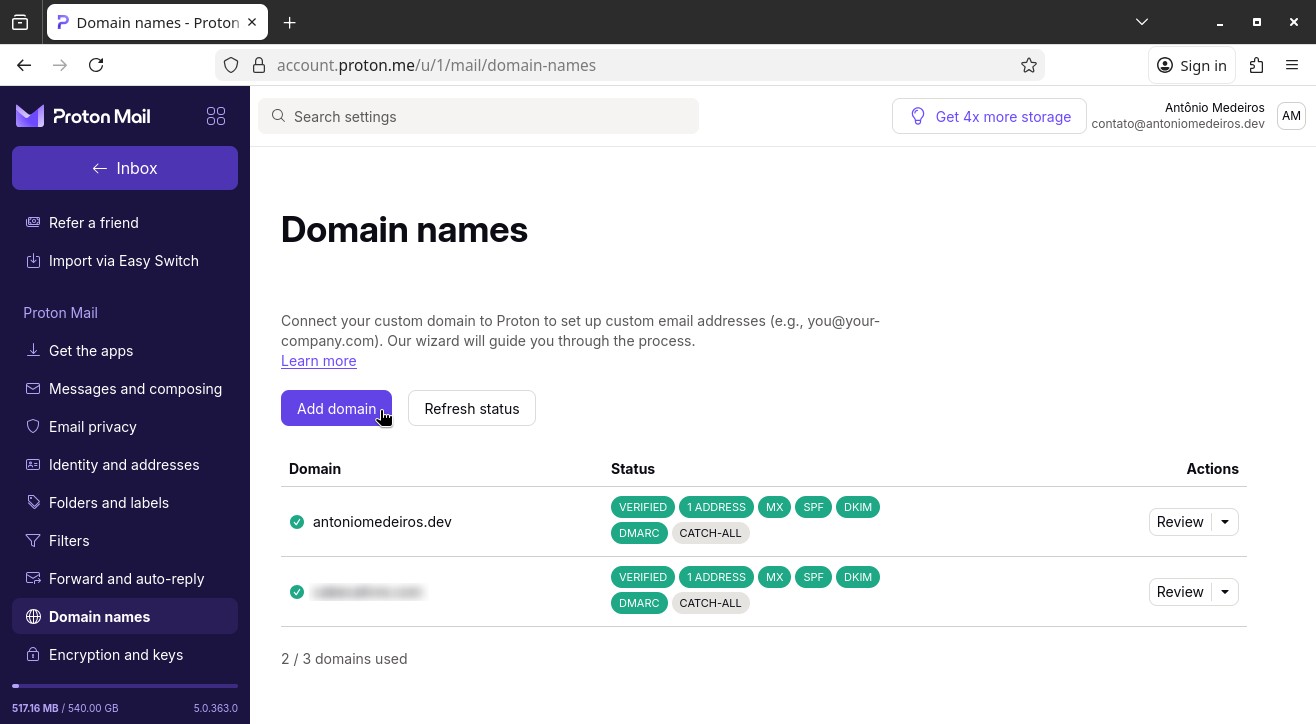
In the left-hand menu, click Domain names. Then, by the right, click Add domain:
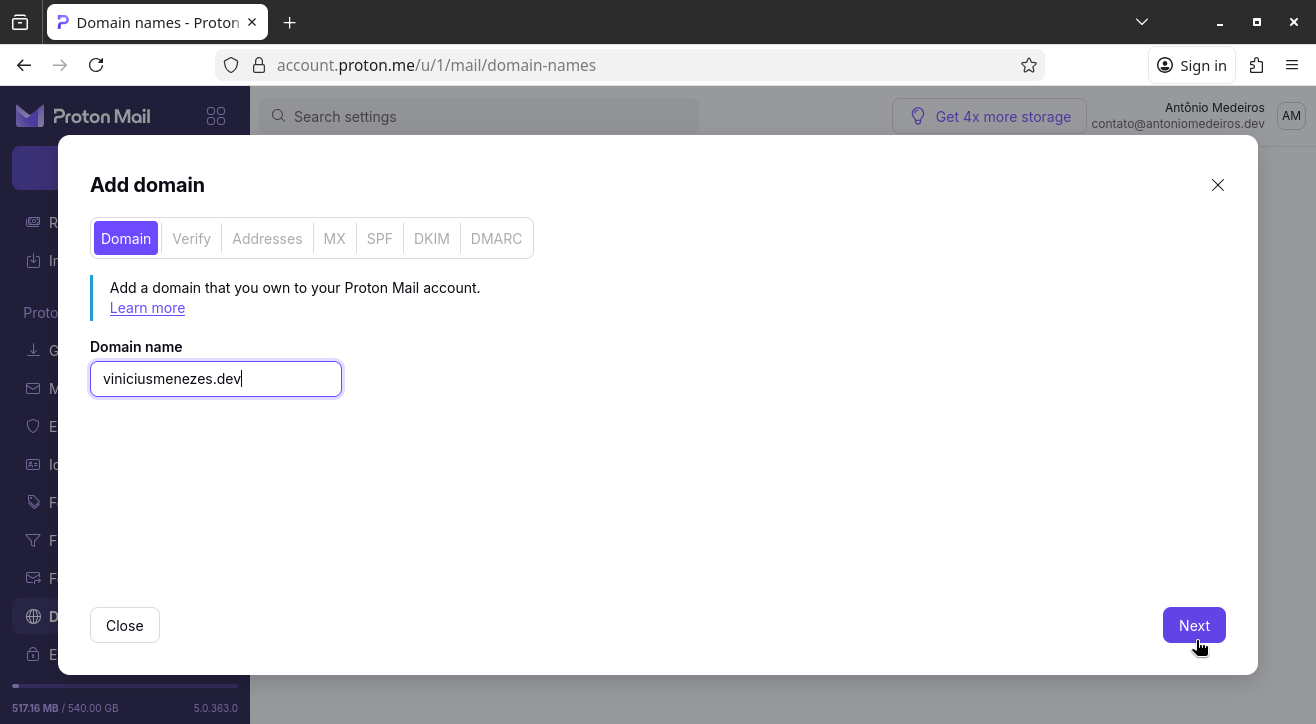
Enter the Domain name (in my case, viniciusmenezes.dev) and click Next:
The next screen shows an entry that you must add to your domain’s DNS configuration so that Proton Mail can verify that you actually own the domain:
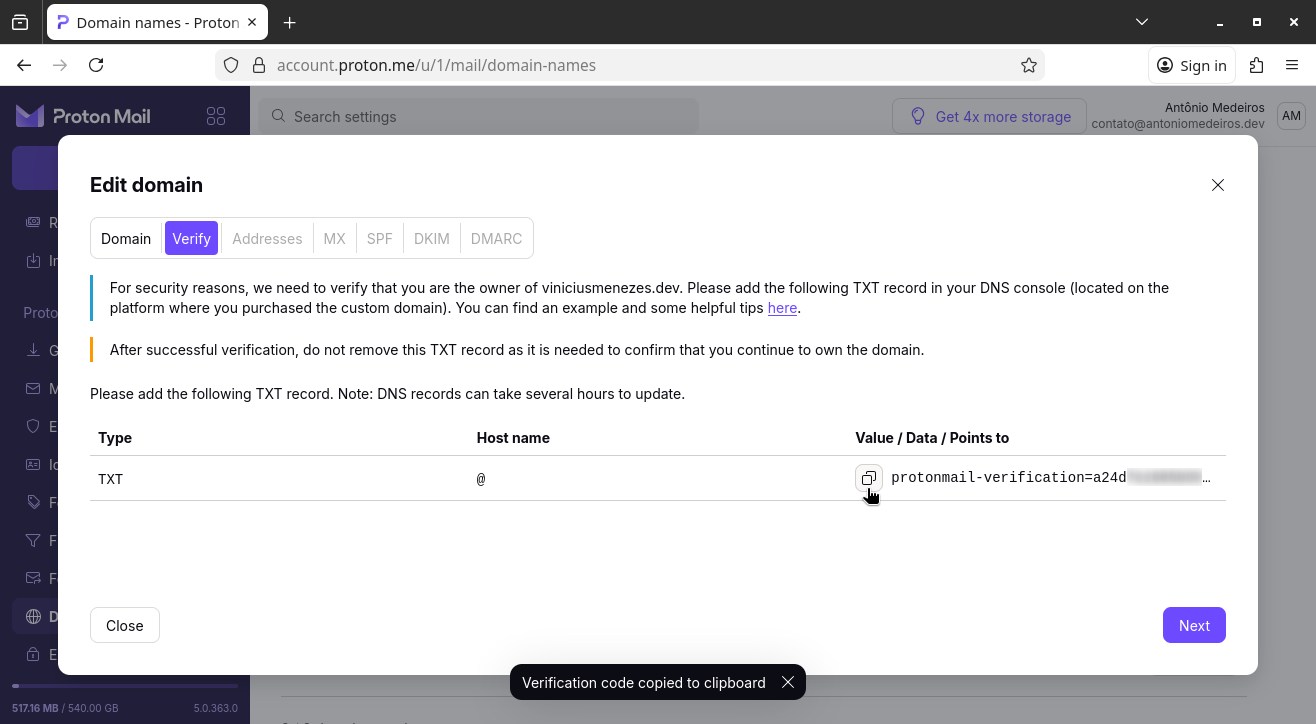
Copy this entry value and add it to your domain’s DNS configuration.
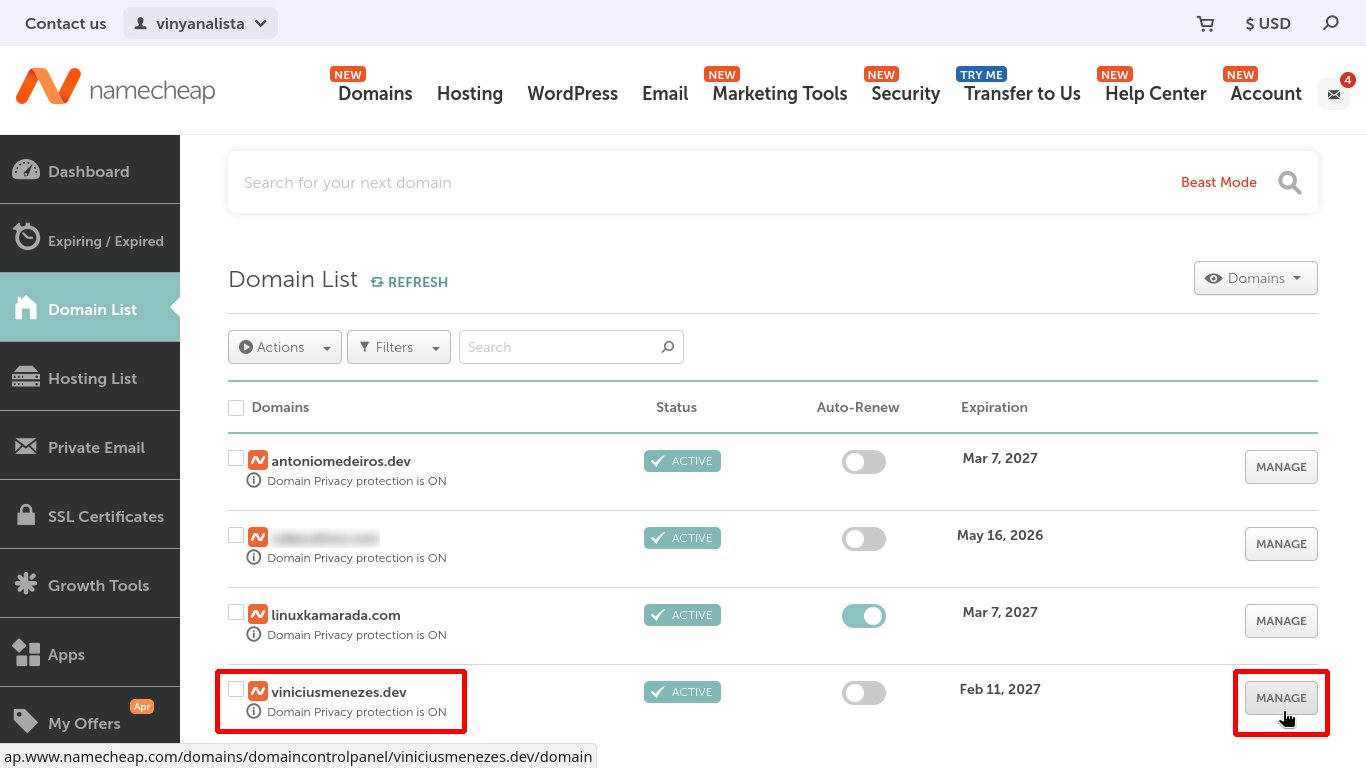
For reference, I will show you how to configure this on Namecheap, since I registered my domain with that company.
Start by signing into Namecheap. Then go to Account > Dashboard > Domain List. On the line corresponding to the domain you want to configure, click Manage:
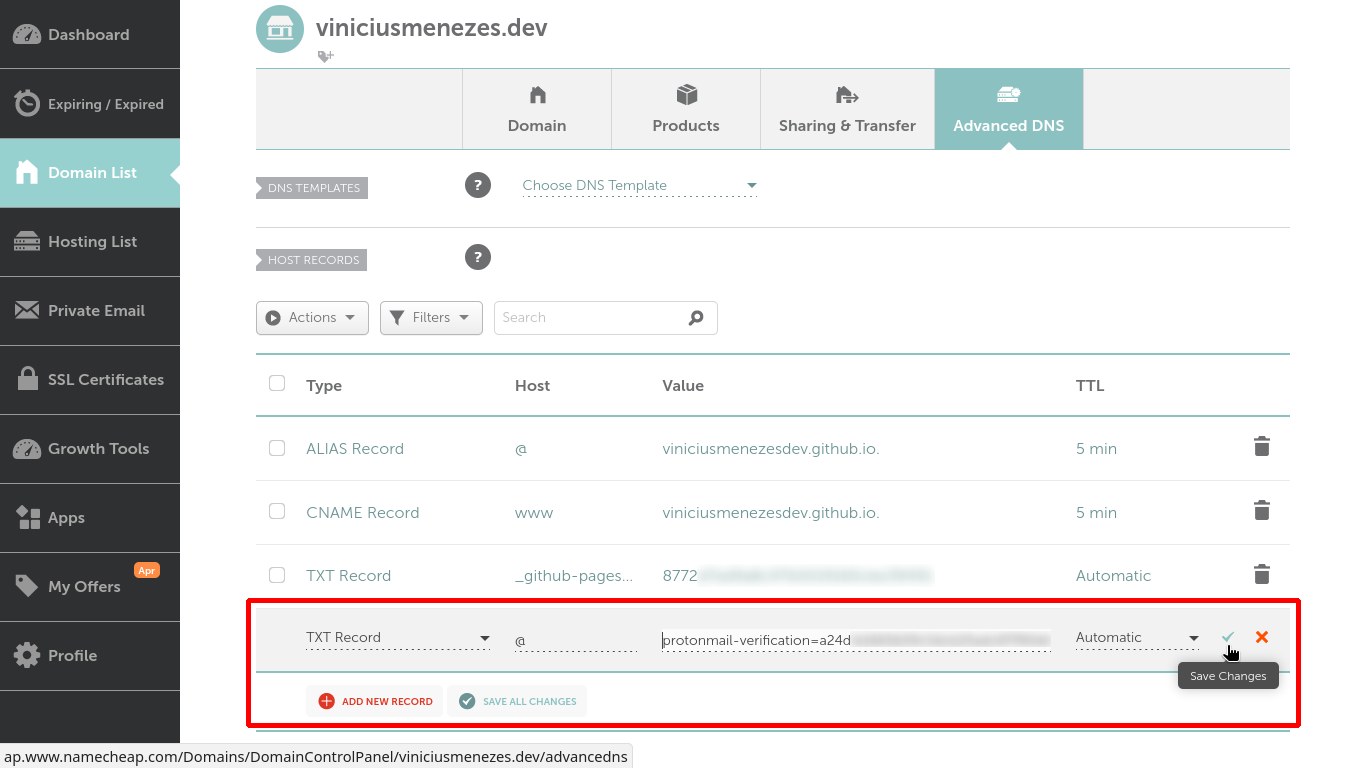
On the next screen, open the Advanced DNS tab, click Add New Record, and add the DNS entry provided by Proton Mail:
After adjusting the DNS settings, back to Proton Mail, click Next.
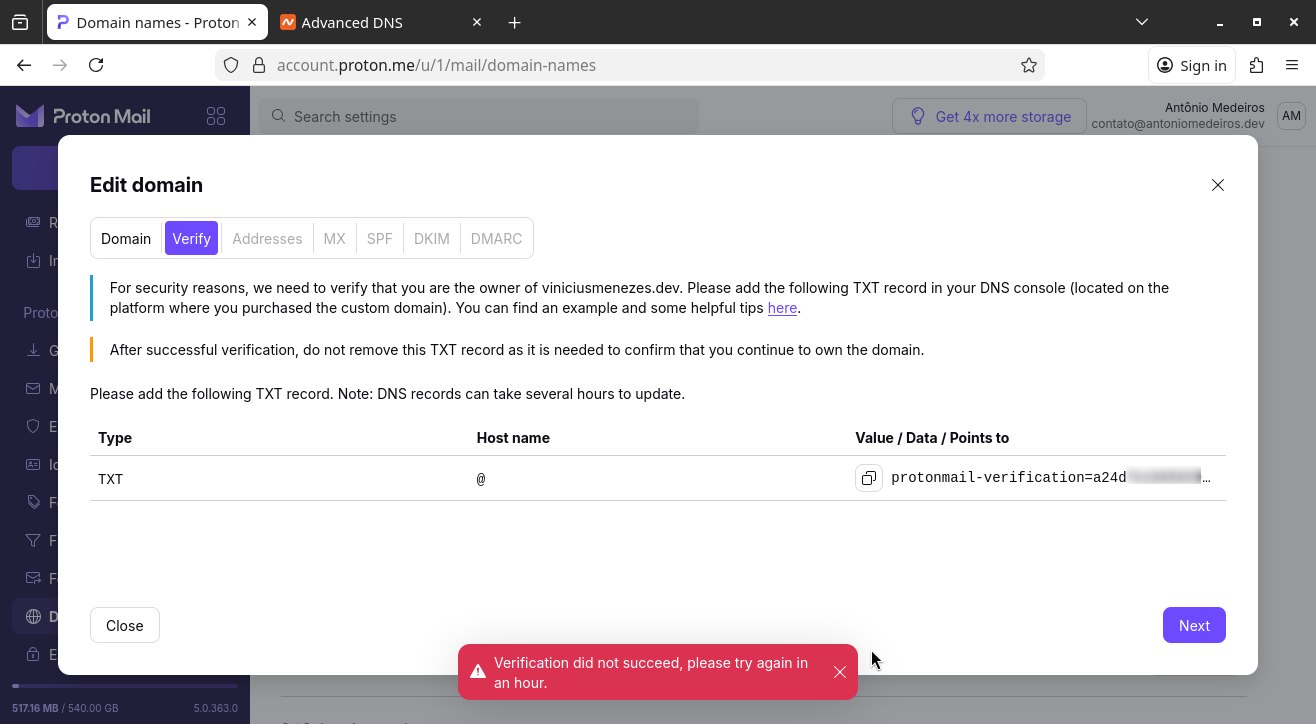
It’s quite likely that Proton Mail will display an error message, because it takes some time for the new DNS configuration to propagate worldwide:
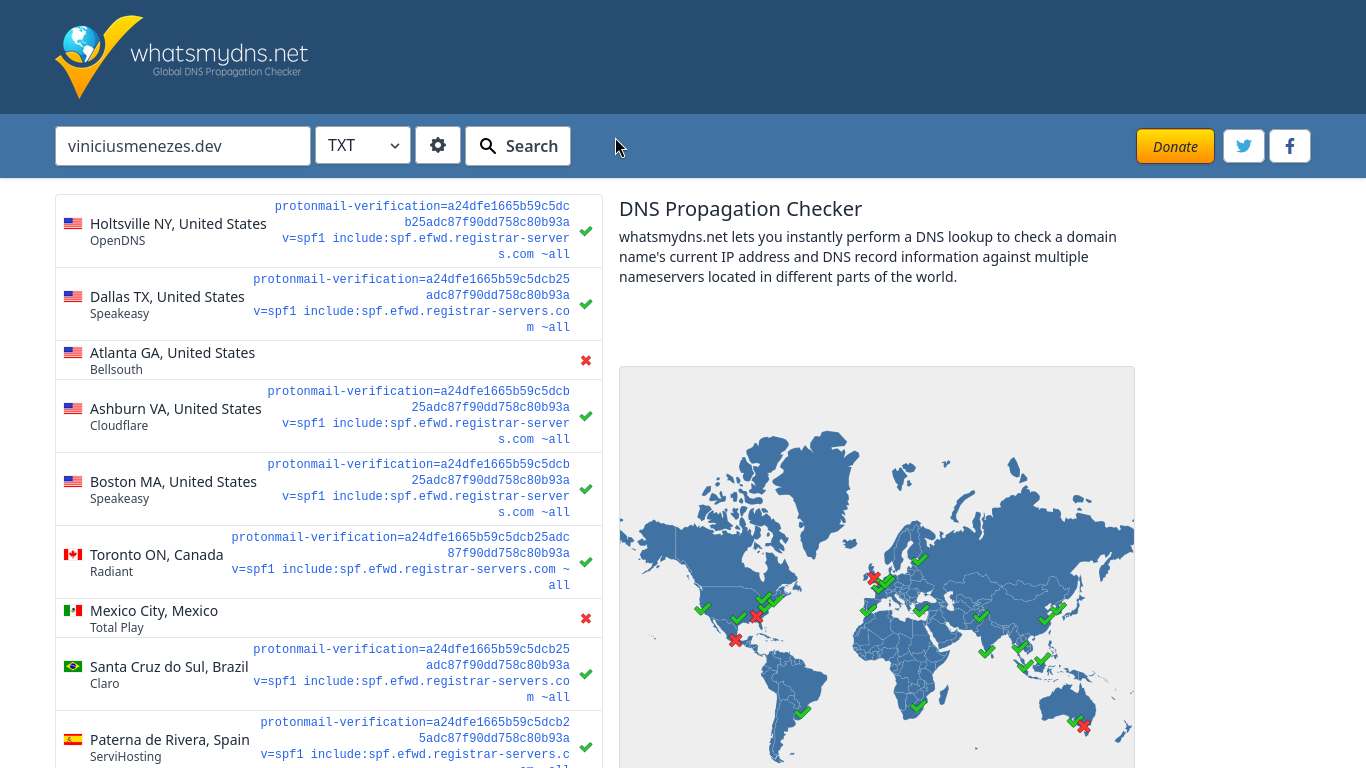
You can track the DNS propagation – which can take minutes, hours, or even days – with the help of some tool like whatsmydns.net:
Once the DNS propagation is complete worldwide, go back to Proton Mail and click Next. Note that the wizard advances and checks the previous steps:
If you are migrating your domain from an email service to another, in the Addresses tab, click the Add address and set up all the email addresses for your custom domain before proceeding, so no emails are lost during migration.
Since I’m starting with this domain, I’m going to skip this for now and just click Next. I’ll come back to set up addresses later.
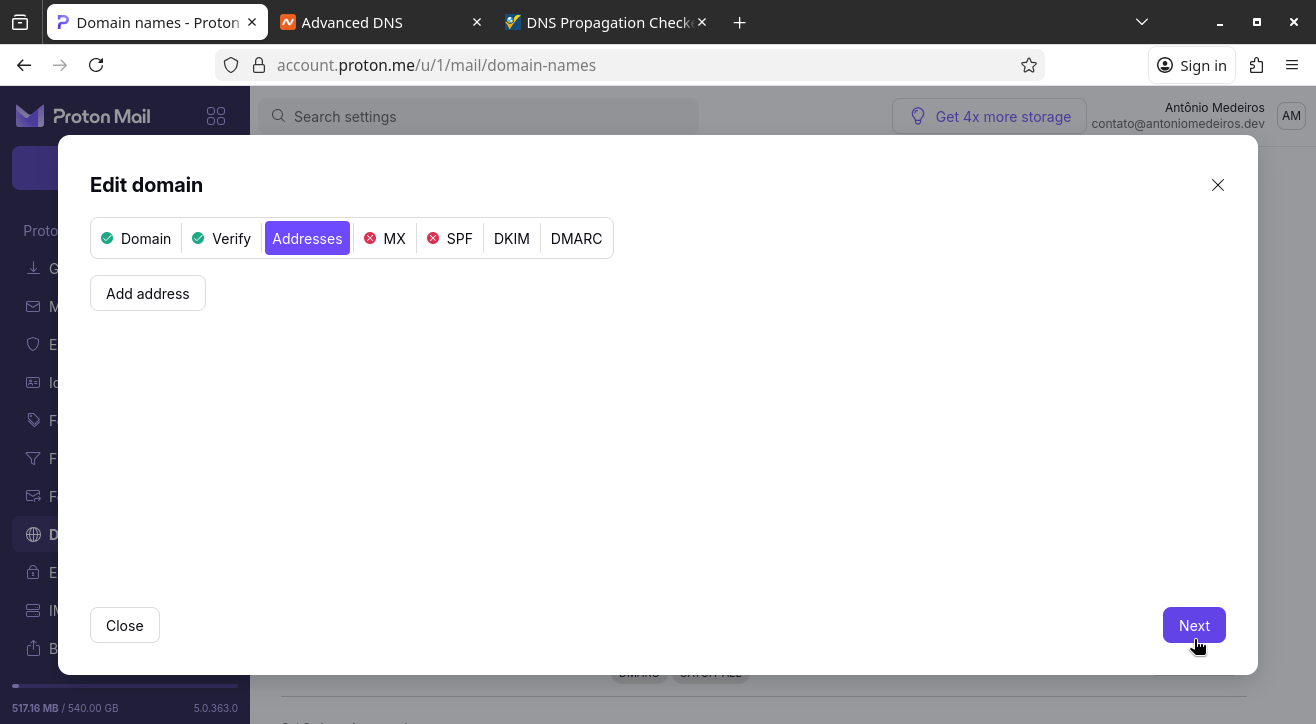
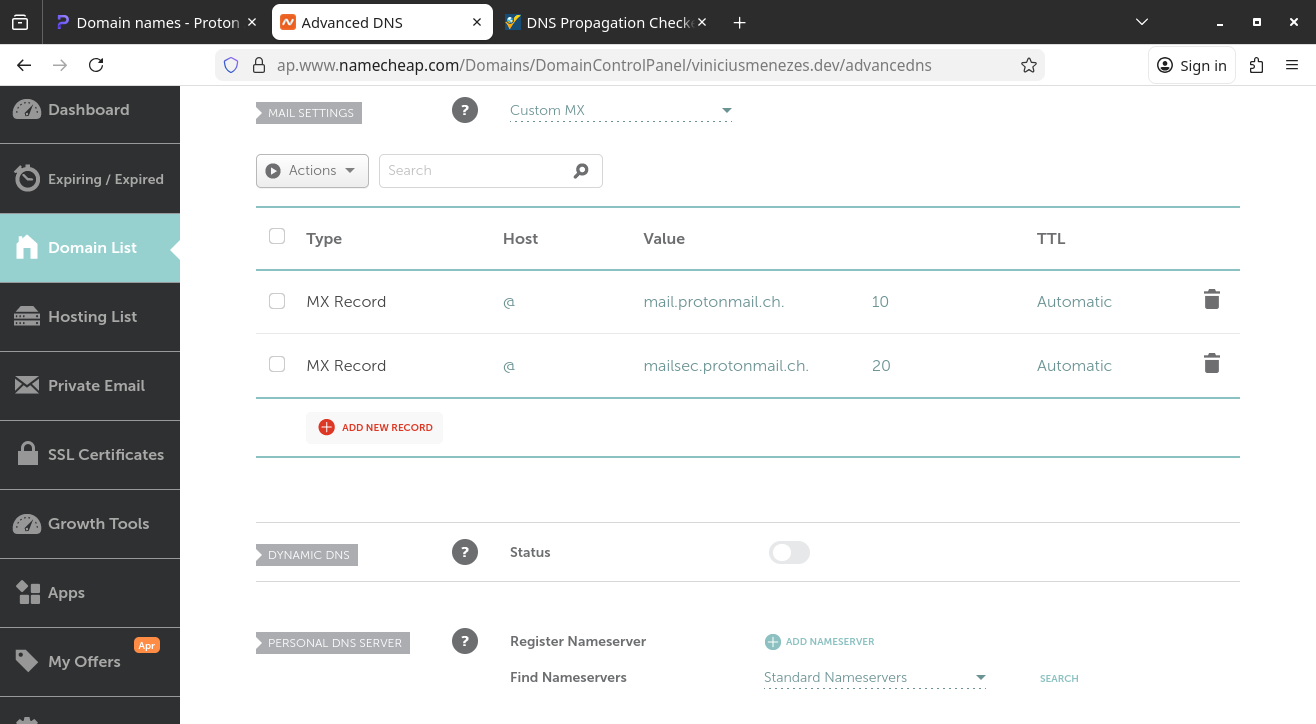
Now comes the configuration of the MX records, the most important ones for emails:
In Namecheap, they can be added on that same screen, further down.
On Mail Settings, select Custom MX. Then add the records provided by Proton Mail:
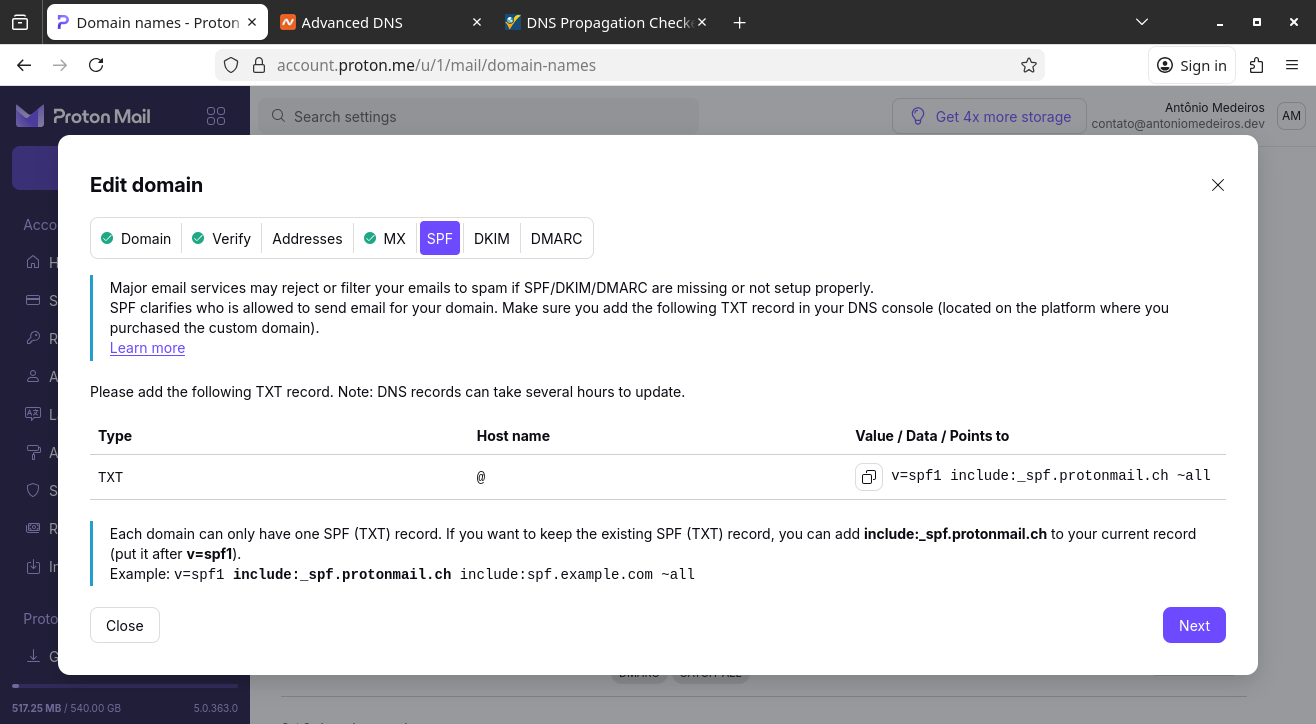
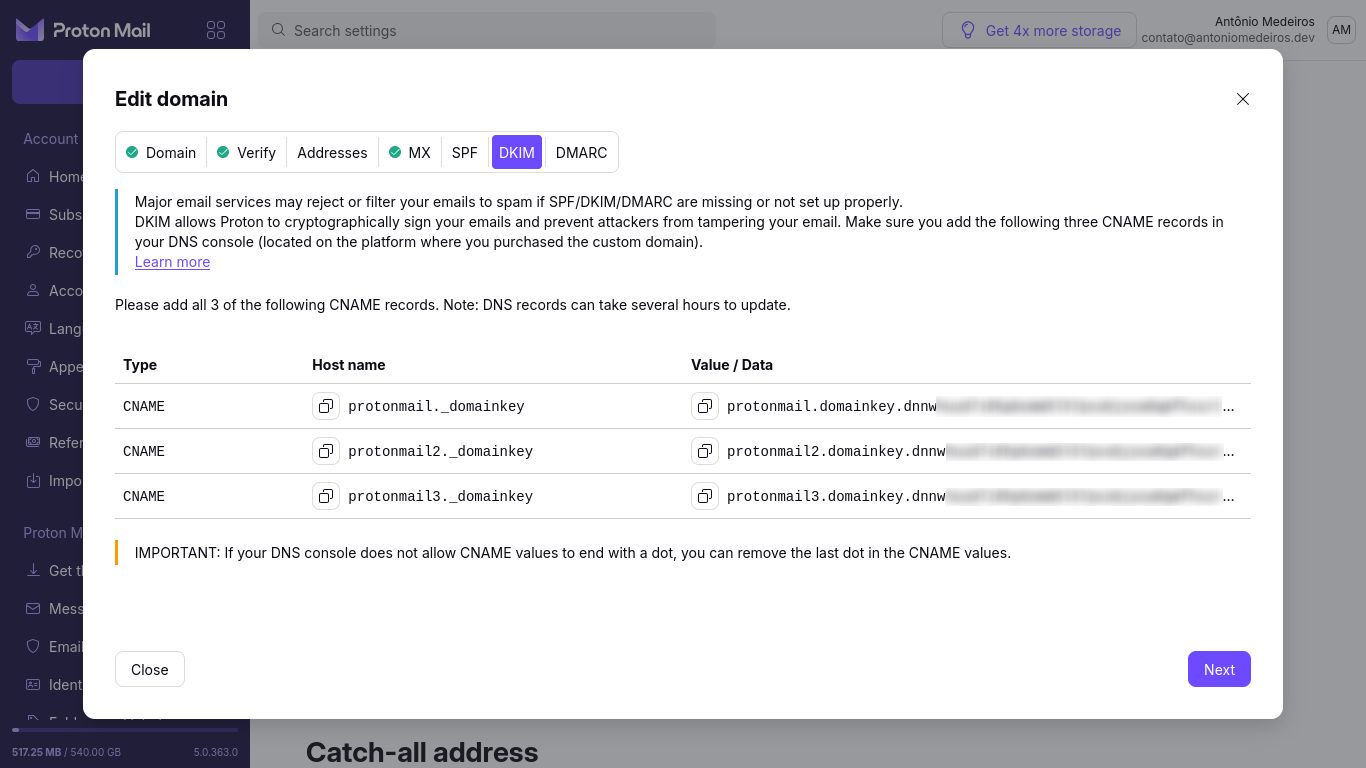
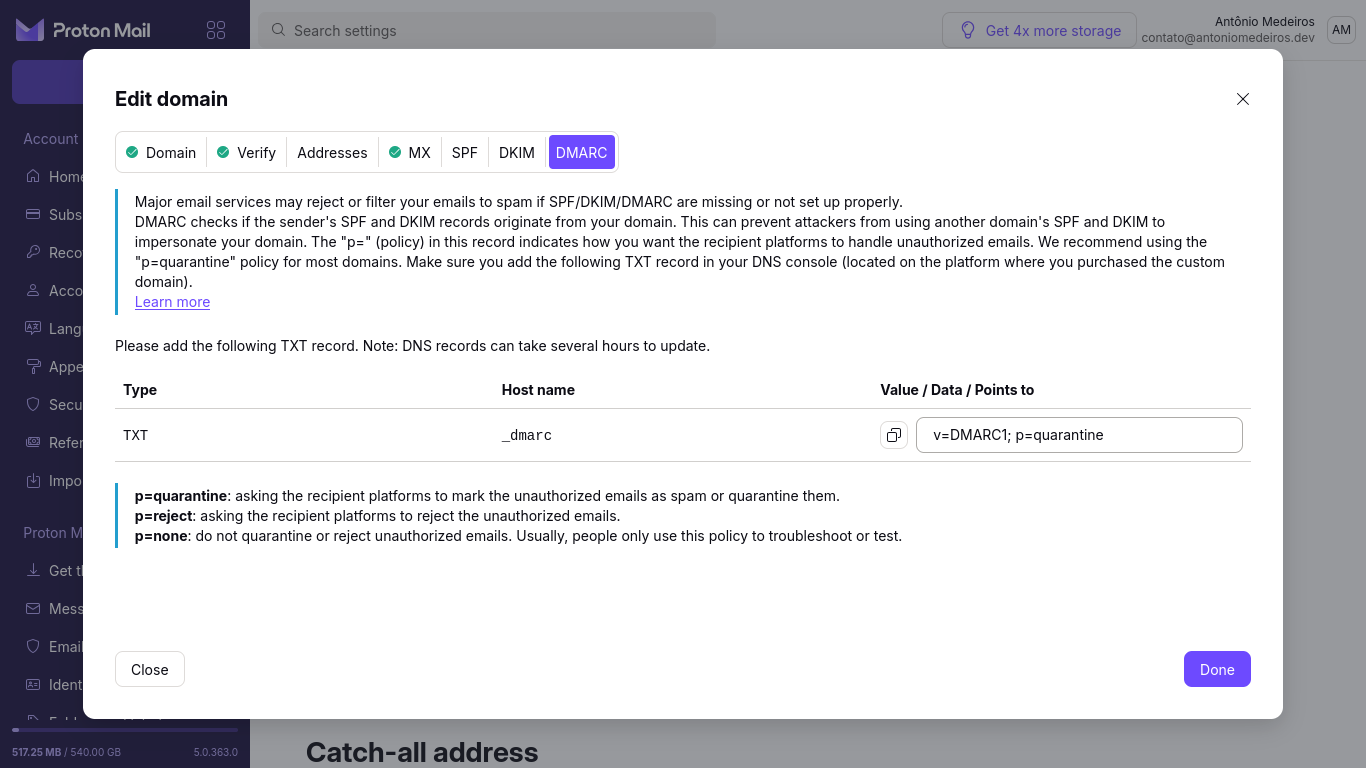
Repeat this for the next steps: proceed through the Proton Mail wizard, copy the DNS entries, add them to the domain configuration, and wait for propagation.
Next, I’ll show you screenshots of the wizard so you can get an idea of what you’ll find:
For reference, here is what my DNS configuration looked like in the end:
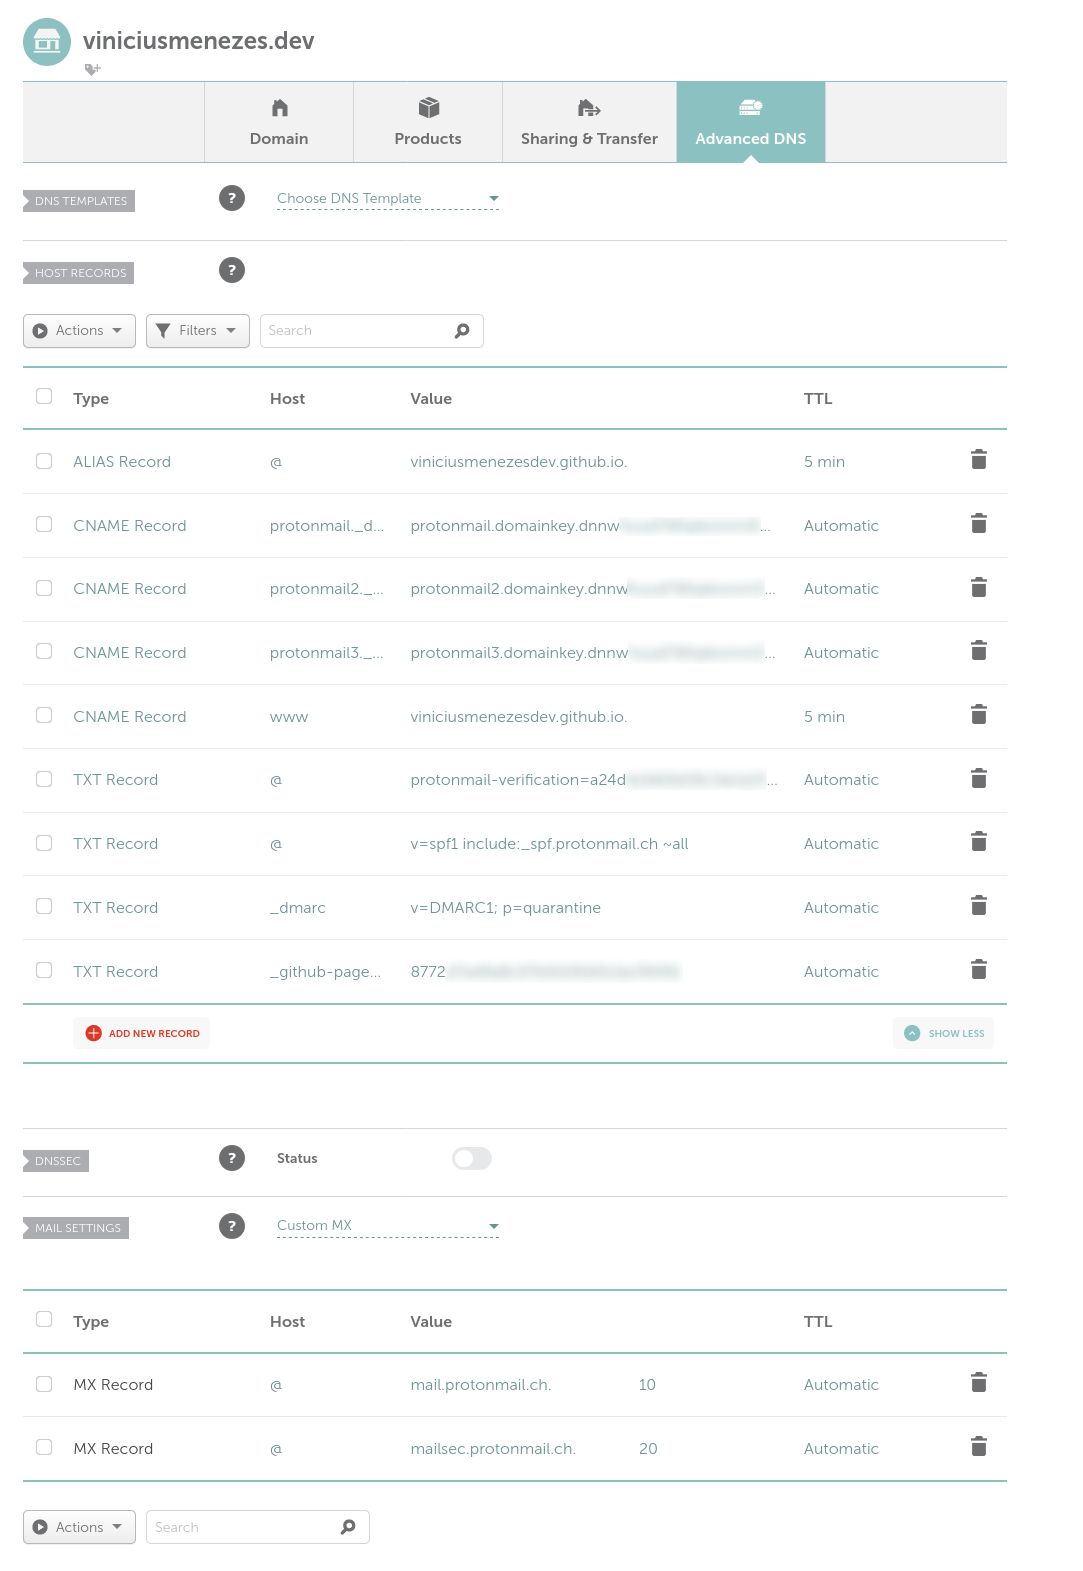
Note that not all of those entries are related to Proton Mail. Some refer to GitHub Pages, where I host my website.
Finally, when you have finished configuring the domain, go back to Proton Mail, switch to the Adresses tab and click Add address.
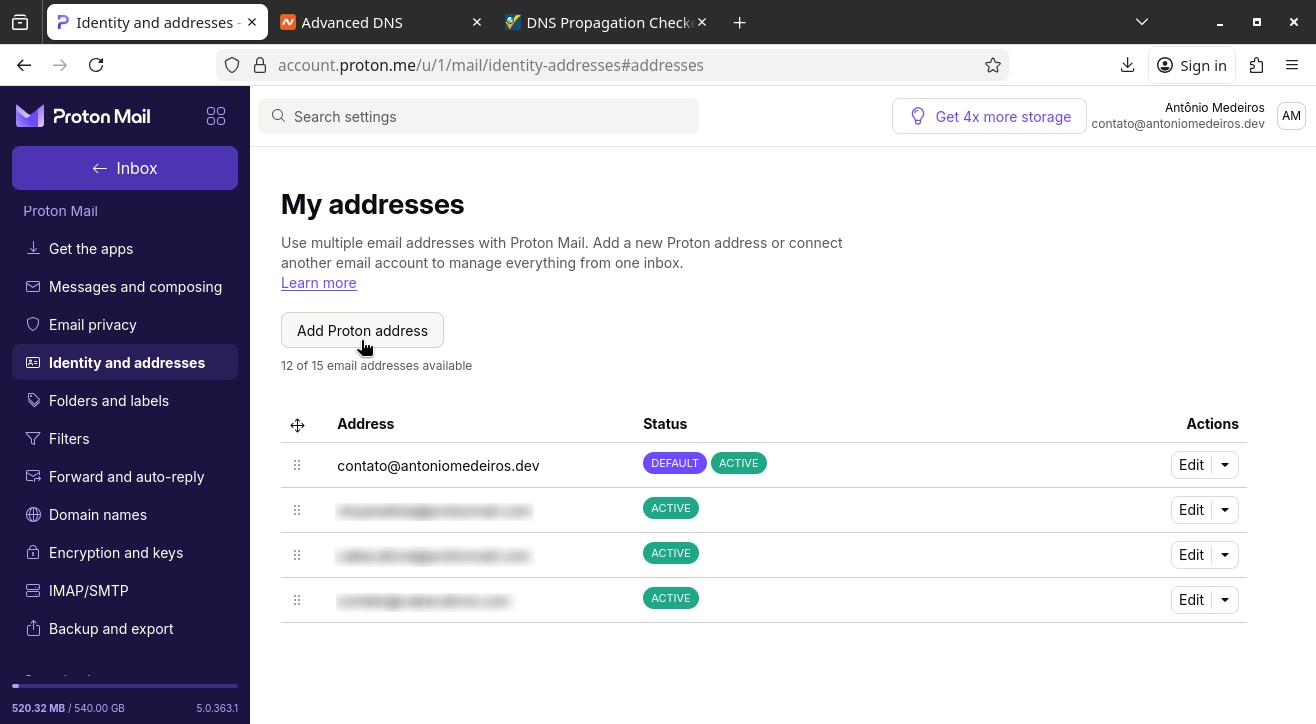
Setting up the email address
On the My addresses screen, click Add Proton address:
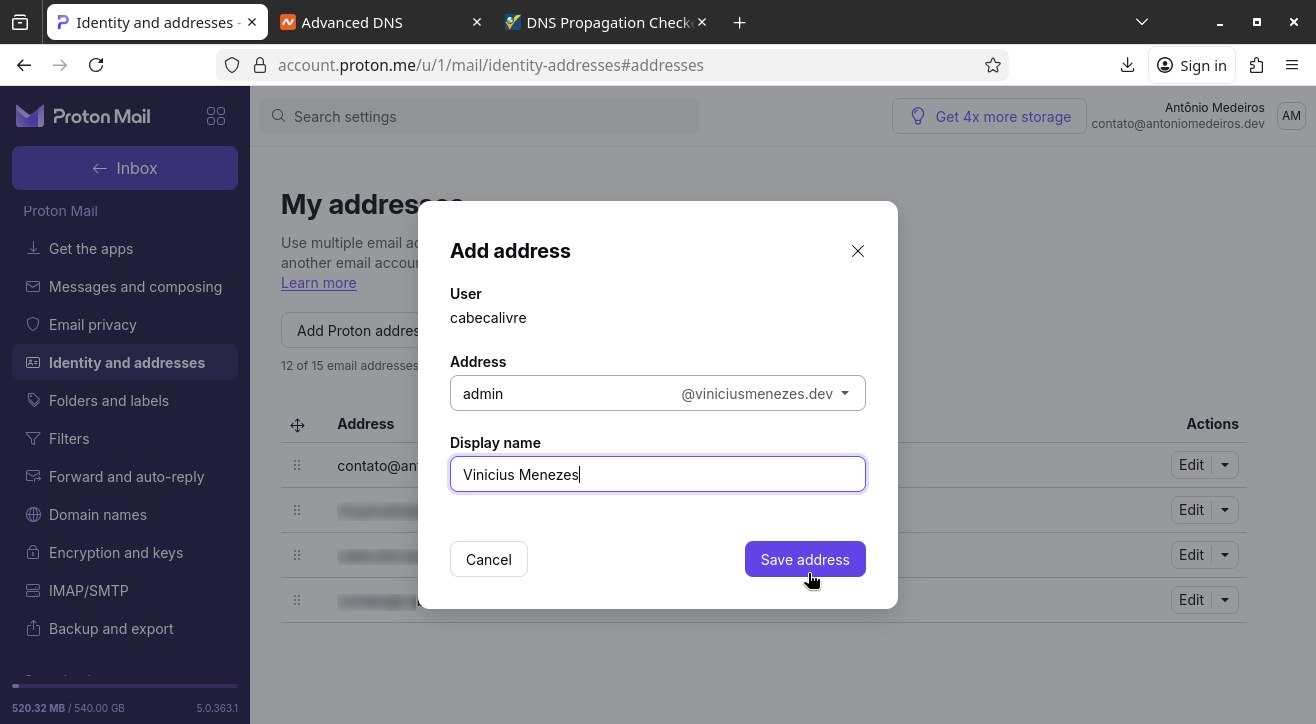
Define the Address (for example, admin@viniciusmenezes.dev) and the Display name (e.g. Vinicius Menezes) and click Save address:
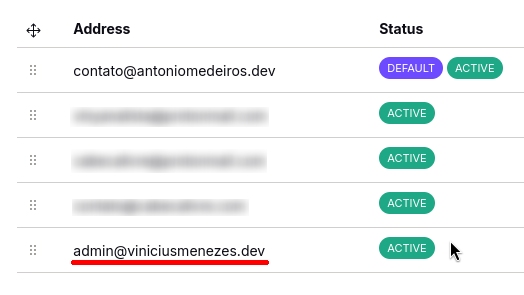
After a few seconds, your new email address will be active and ready to use:
Testing your custom email address
You can now test your custom email address with your custom domain.
If you have another email account (e.g. Gmail), you can try sending an email to your new address and receiving it in Proton Mail:

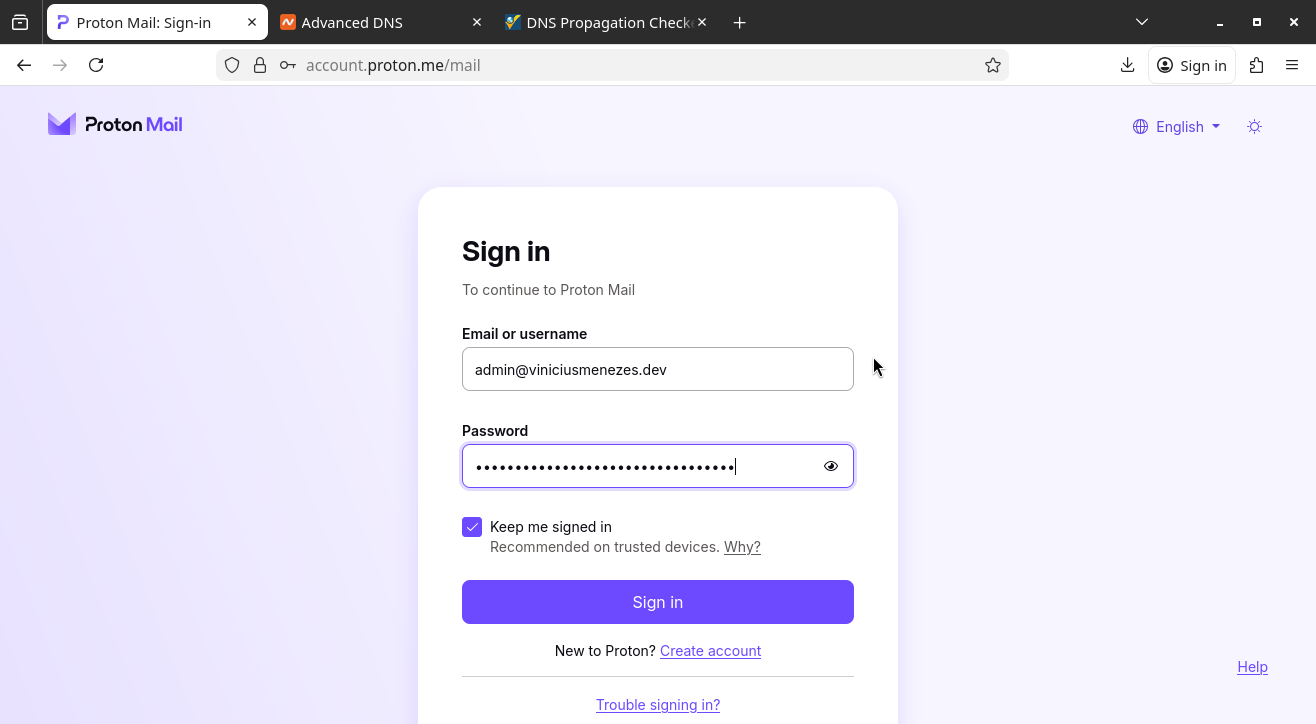
Note that you can also log in to Proton Mail using your custom email address:
References
If you need more information, you can consult the same pages I consulted to set up my domain and write this tutorial:
Or you can write your question in the comments.
I hope this tutorial has helped you. Until next time!